Instructions for replacing brake shoe kits

Please read and follow all instructions carefully. You’ll find the same instructions in the brake shoe pack. Remember to keep them for the entire product life cycle. Hand them over to the new owner if you sell your vehicle.

These fitting instructions are a guideline for standard repair work and do not take into consideration any special features which might apply to the different brake systems. The special instructions issued by vehicle and brake system manufacturers must be followed in detail.


Firstly accurately identify the correct reference serial number of the shoes suitable for your car, according to the year of manufacturer and braking system. Brake shoes must be replaced in the whole axle.

 
Preparing the vehicle
 
Before replacing the brake shoes, we recommend you pay attention to the following:
Etichetta che indica il corretto kit da utilizzare per il veicolo
1. Choose your kit number carefully according to your vehicle. Note the application dates.
Attrezzi adatti e affidabili da utilizzare
2. For your safety, always use suitable and reliable repair tools.
Smontaggio ruote
3. Proceed correctly, wheel by wheel, keeping the other assembly as an example.
Strumenti per spurgare il circuito dei freni
4. After installing the kit, bleed the brake circuit.
 
Indicazione che segnala di non frenare
5. Do not press the brake pedal during these operations.
Divieto di utilizzo dell'aria compressa per pulire
6. Do not use compressed air for cleaning.
Guarnizioni non devono essere sporcate
7. Protect new seals from any soiling until assembly is completed.
 
 
BENDIX RAI
Disassembly procedure
Cacciavite per svitare la ruota del tamburo e smontarlo
1. Disassemble the drum. In the event of difficulty, to loosen the seals, insert a screwdriver through a wheel mounting hole on the drum, and push back the hand brake lever behind the core of the brake block.
Frecce che indicano come smontare le molle di appoggio
2. Disassemble the support springs.
Frecce che indicano come liberare gli appoggi inferiori delle ganasce
3. Release the lower supports of the brake shoes. Bring together these lower supports with the brake shoes in order to release the upper tips.
Freccia indica come girare le ganasce e la bielletta
4. Tilt back the brake shoe-rocker bar unit and unhook the hand brake cable.
frecce indicano come smontare il cilindretto
5. Disassemble the wheel cylinder.
Pennello per pulire piatto e tamburo
6. Clean the wheel shield and the drum using a dry paint brush.
 
 
Refitting procedure
frecce indicano come rimontare il cilindretto
7. Refit the new wheel cylinder.
frecce indicano come riagganciare il freno a mano sul kit
8. Hook up the hand brake cable onto the kit.
frecce indicano come posizionare i becchi delle ganasce
9. Position the tips of the brake shoes on the wheel cylinder and then the supports on the lower stop.
frecce indicano come montare le molle di appoggio
10. Reassemble the support springs.
indicazione di premere il pedale del freno
11. Reassemble the drum. Then press the brake pedal repeatedly.
 
IMPORTANT bleed the brake circuit.
 
BENDIX RAD
Disassembly procedure
Cacciavite per svitare la ruota del tamburo e smontarlo
1. Disassemble the drum. In the event of difficulty, to loosen the seals:

a. Insert a screwdriver through a wheel mounting hole on the drum, and push back the hand brake lever behind the core of the brake block.

b. The drum has a hole on the front side: insert a rod through the opening and disarm the brake clearance adjustment by tilting the catch bolt (fig.1) downwards.

c. The drum has no hole on the front side: insert a rod through the opening of the seal (fig.2 rear side of the wheel shield) and push back the hand brake lever behind the core of the brake block.

Frecce che indicano come smontare il cilindretto
2. Disassemble the wheel cylinder.
Frecce che indicano come smontare le molle di appoggio
3. Disassemble the support springs.
Freccia indica come girare le ganasce e la bielletta
4. Disassemble the brake shoes-rocker bar unit.
frecce indicano come sganciare il freno a mano.
5.A Unhook the hand brake cable.
5.B Tilt back the brake shoe-rocker bar unit and unhook the hand brake cable.
Pennello per pulire piatto e tamburo
6. Clean the wheel shield and the drum using a dry paint brush.
 
Refitting procedure
frecce indicano come rimontare il cilindretto
7. Refit the new wheel cylinder.
frecce indicano come riagganciare il freno a mano sul kit
8. Hook up the hand brake cable onto the kit.
frecce indicano come posizionare i becchi delle ganasce
9. Put the kit in place by positioning the tips of the brake shoes on the wheel cylinder and then the supports on the lower stop.
frecce indicano come montare le molle di appoggio
10.  Reassemble the support springs.
indicazione di premere il pedale del freno
11. Reassemble the drum. Then press the brake pedal repeatedly and adjust the hand brake.
 
 
IMPORTANT bleed the brake circuit.
 
 
VOLKSWAGEN RAD and FORD RAD
Disassembly procedure
 
The procedure for disassembling and reassembling Volkswagen RAD and Ford RAD kits is identical.
Cacciavite per svitare la ruota del tamburo e smontarlo
1. Disassemble the drum. In the event of difficulty, to loosen the seals, insert a screwdriver through a wheel mounting hole on the drum, and disarm the brake clearance adjustment by pushing the shear connector (fig. 1) upwards.
Frecce che indicano come smontare le molle di appoggio
2. Disassemble the support springs.
Frecce che indicano come liberare gli appoggi inferiori delle ganasce
3. Release the lower supports of the brake shoes. Bring together these lower supports with the brake shoes in order to release the upper tips.
Freccia indica come girare le ganasce e la bielletta
4. Tilt back the brake shoe-rocker bar unit and unhook the hand brake cable.
frecce indicano come smontare il cilindretto
5. Disassemble the wheel cylinder.
Pennello per pulire piatto e tamburo
6. Clean the wheel shield and the drum using a dry paint brush.
 
Refitting procedure
frecce indicano come rimontare il cilindretto
7. Refit the new wheel cylinder.
frecce indicano come riagganciare il freno a mano sul kit
8. Hook up the hand brake cable onto the kit.
frecce indicano come posizionare i becchi delle ganasce
9. Put the kit in place by positioning the tips of the brake shoes on the wheel cylinder and then the supports on the lower stop.
frecce indicano come montare le molle di appoggio
10.  Reassemble the support springs.
freccia e numero uno indicano di spingere la chiavetta in alto
11. Push the shear connector (fig.1) upwards as far as possible and check that the brake shoes are centred on the wheel shield.
indicazione di premere il pedale del freno
12. Reassemble the drum. Then press the brake pedal repeatedly and adjust the hand brake.
 
IMPORTANT bleed the brake circuit.
 
 
LUCAS GIRLING RAI
Disassembly procedure
Cacciavite per svitare la ruota del tamburo e smontarlo
1. a) Disassemble the drum. In the event of difficulty, to loosen the seals, insert a screwdriver through a wheel mounting hole on the drum, and push back the hand brake lever behind the core of the brake block.

b) Disassemble the drum. In the event of difficulty, to loosen the seals, insert a screwdriver through the opening of the seal (fig.1 rear side of the wheel shield) and push back the hand brake lever (fig.2) behind the core of the brake block.

Frecce che indicano come smontare le molle di appoggio
2. Disassemble the support springs.
Frecce che indicano come smontare le molle di appoggio
3. Release the lower supports of the brake shoes. Bring together these lower supports with the brake shoes in order to release the upper tips and disassemble the unit.
Freccia indica come girare le ganasce e la bielletta
4.A Tilt back the brake shoe-rocker bar unit and unhook the hand brake cable. 
4.B Unhook the hand brake cable.
frecce indicano come smontare il cilinderetto
5. Disassemble the wheel cylinder.
Pennello per pulire piatto e tamburo
6. Clean the wheel shield and the drum using a dry paint brush.
 
Refitting procedure
frecce indicano come rimontare il cilindretto
7. Refit the new wheel cylinder.
frecce indicano come riagganciare il freno a mano sul kit
8. Hook up the hand brake cable onto the kit.
frecce indicano come posizionare i becchi delle ganasce
9. Put the kit in place by positioning the tips of the brake shoes on the wheel cylinder and then the supports on the lower stop.
frecce indicano come montare le molle di appoggio
10.  Reassemble the support springs.
indicazione di premere il pedale del freno
11. Reassemble the drum. Then press the brake pedal repeatedly and adjust the hand brake.
 
 
IMPORTANT bleed the brake circuit.
 

Brake shoes must be replaced in the whole axle.
 
 
General and safety information
 
This Brembo product has been designed to comply with all applicable safety standards. Products are not intended to be used differently from the specific use for which they have been designed and manufactured. Use for any other purpose, or any modification to or tampering with the Product can affect the performance of the Product and may render the Product unsafe.
 

Such modification or improper use will void the Limited Warranty, and may subject the individual so using the Product to liability for bodily injury or property damage to others.


Brake pads are subject to wear and must therefore be checked at regular intervals.


If the thickness of friction material remaining on a pad is less than 2 mm or the wear indicator lights up, replace all the pads on an axle.


Brembo EV KIT discs and Brembo EV Kit pads must always be fitted in combination with one another. Combining them with different products could jeopardise the proper functioning of the KIT.


In these instructions, the “DANGER!” warning means procedures which, if not observed, have a high degree of probability that they will cause serious injury or even death.CAUTION”” means procedures which, if not observed, could result in physical damage whereas “WARNING!” means procedures which, if not observed, could possibly cause  damage to the vehicle.


DANGER!

Before commencing replacement, ascertain that the spare parts are suitable for the make and model of the vehicle. This Product is vital to the safe operation of the vehicle on which it is installed, and it is intended to be installed only by a skilled, qualified individual who has been trained and/or is experienced in the installation and use for which the Product is intended.


The installer must be equipped with the proper tools of his trade, and with the knowledge and experience to deal with vehicle repairs. Improper or incorrect installation, whether caused by a failure to follow these Instructions faithfully and completely or otherwise, will void the Limited Warranty and could subject the installer to liability in the event of personal injury or property damage.

Brembo shall not be liable for any damage or injury caused to or by any person operating a vehicle on which a replacement product has been improperly installed.


CAUTION!

Replaced parts must be disposed of in accordance with the law.
It is vital to avoid sharply striking and/or damaging the Product, its parts and its components, as this can impair their efficiency and may cause them to malfunction. If necessary, replace any damaged part or component. To avoid injury we recommend the following:
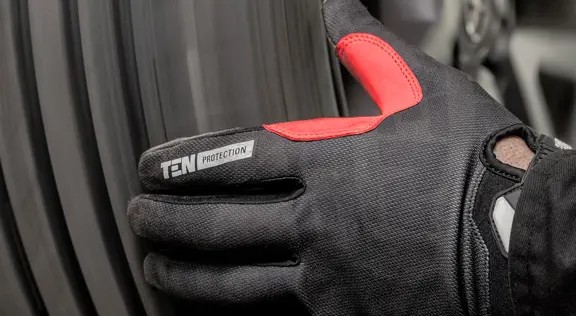
  • Always wear gloves during disassembly and assembly of components with sharp edges.
  • Do not allow skin surface to make direct contact with the friction material of pads and brake shoes since this could cause abrasions.
Warranty limitations
This warranty covers all the conformity defects occurring within two years from delivery of the good. The consumer is required to report to the seller the conformity defect within two months from the date of discovery of the said defect, without prejudice to the fact that the limitations period for taking action aimed at seeking redress for the defect is twenty-six months from delivery of the good. In the event of a conformity defect, the user has the right to repair or replacement of the good, or to an appropriate price reduction or termination of the contract, as established by art. 130 of the Consumer Code, where applicable.

This warranty constitutes the only warranty provided in relation to this product and replaces any other warranties, both verbal and written.
Is there anything else you want to ask?

Contact the Brembo technical support team. Our technicians will get back to you as soon as possible!
Return to the index
Car fitting
Read the next article
Instructions for replacing the Central Clutch Slave Cylinder (CCSC)
Privacy Policy">