Instructions for disassembly and installation of brake pads for motorcycles and scooters
Replacing the brake pads without disassembling the caliper from the vehicle
- Fixed caliper, type A (removal of side pads).
- Floating caliper, type B (removal of bottom pads).
1. Remove the dust cap cover, if provided.
2. Disconnect the wear indicator connector, if provided.
3. Disassemble the safety accessories such as retaining clips, fixing pins, springs or screws used to fix the pads.
CAUTION! The springs that retain-push the pads are under load; they must be released in a controlled manner and, if possible, kept in position using the caliper body.
4. In some models the spring remains fixed to the pads and is then removed and replaced with them.
WARNING! Ensure that the pistons are not damaged during retraction.
WARNING! Ensure that the pistons are not damaged during retraction.

For fixed calipers type A
- If necessary, use a retractor to retract the pads.
- Extract the pads from the caliper body.


For floating calipers type B
- Push the caliper body against the support, pressing it against the disc with your fingers.
- First disassemble the pad on the piston side, then push the caliper body towards the disc until the other pad can be removed from the caliper body.
CAUTION! The springs that retain-push the pads are under load; they must be released in a controlled manner and, if possible, kept in position using the caliper body.
For calipers type A and B
Check the condition of the plates, if provided, and replace them if damage.
Remove and inspect any shims and, if worn or damaged, replace them with new ones.
WARNING! Do not dismantle any plates or caps which may be firmly connected to brake piston.
DANGER! If there are signs of fluid contamination or other damage to the caliper, replace it with a new caliper.
Replacing the pads with the caliper partially disassembled:
“Closed body” fixed caliper type C (removal of top pads), D and E (removal of side pads).

1. If provided, disconnect the wear indicator connector.
2. According to the caliper configuration, disassemble or unscrew the fixing screws/guides etc.

DANGER! Avoid creating bends, kinks, stretching or other contortions of the brake fluid supply tube
WARNING! If necessary, use a retractor to retract the pads.

3. Disassemble the safety accessories such as retaining clips, fixing pins, springs or screws used to fix the pads.
4. Extract the pads from the caliper body.
Preparation for installation
1. Remove all traces of corrosion on the outer and inner edge of the disc braking surface.
WARNING! If the disc surface shows cracking or deep streaking, replace the disc.
2. Fully retract the pistons. With 2 or 4 piston calipers, retract all the pistons simultaneously using a shim.
For brakes that combine a mechanical parking brake and adjustment feature, the pistons must be brought back to their original position by turning manually or by means of adjustment screws, depending on their type.
3. Clean the pad resting area using suitable material and products (e.g. a damp cloth) prior to installation.3. Clean the bracket, the caliper body and the guides with a non-mineral-oil-based detergent.4. Replace any cracked or damaged dust boots.
WARNING!
- Replace corroded guide bolts.
- Do not use products that could damage the rubber parts such as nitro thinner, petroleum etc.
- Do not clean the braking system components with compressed air, hard brushes or similar.
- Do not remove grease from guides and springs that require specific lubrication for correct operation.
DANGER!
- For floating calipers – if necessary, moisten the caliper body slide guides with the enclosed grease, and follow the directions of the vehicle or caliper manufacturer.
- Ensure that the friction surfaces do not become greasy; if so, replace any such contaminated components with new products.
Installation and assembly
1. Insert the new pads following the instructions described above in «Disassembly» in reverse order.
DANGER!
- Shims which are not corroded, bent or embedded may be reinstalled. Otherwise replace them with new ones.
- The pads must be inserted with friction material facing the disc.
WARNING!
- Once the pads have been fitted, they must be able to move freely in their seat.
- In case of asymmetric pads, the arrow marked on them indicates the vehicle forward rotation.
- If the kit includes a sachet of grease, apply the grease only on the side of the metal part of the pads and /or on the back of the pads, as indicated by the vehicle manufacturer.
CAUTION!
- Check the correct positioning of any springs in the pad seats
- If provided, reconnect the wear indicator.
2. If not fixed to the pads, reposition the spring.
CAUTION! The spring is positioned correctly when it allows insertion of the pin or pins and when any arrows stamped on it are pointing in the forward disc rotation direction.
3. Reposition the pin or pins, retaining the spring in position, abutting them against the opposite side of the caliper body. A pin is correctly abutted when it cannot be pushed any farther forward.
For calipers with screwed pin, tighten the pin by applying the closing torque prescribed by the vehicle and/or caliper manufacturer.
Refit the safety accessories, if provided: retaining clips, springs or screws.
DANGER! Ensure correct fixing of the pads.
4. If scheduled, reposition any dust cap cover by exerting a slight pressure.
5. If present, reconnect the wear indicator cable.
6. Refit the caliper and tighten the fixing screws, applying the closing torque prescribed by the vehicle manufacturer.
DANGER! Avoid creating bends, kinks, stretching or other contortions of the brake fluid supply tube.
7. In the case of a caliper with radial fitting (screw axis perpendicular to wheel axis), refit the caliper and tighten the fixing screws by hand, without using tools. Operate the brake a few times and tighten the screws, applying the closing torque prescribed by the vehicle manufacturer.
CAUTION! For calipers with parking brake or with system for automatic recovery of clearance – Operate a few times to restore the usual clearance (return). Follow the directions of the vehicle or caliper manufacturer.
8. Follow the same procedure on the other caliper of the same axle, if provided.
9. If disassembled, refit the wheel following the vehicle manufacturer’s instructions.
Operating checks
1. Check the brake fluid level in the reservoir and top up with new fluid, if necessary, as far as the max mark on the reservoir following the vehicle manufacturer’s instructions.
2. Carefully clean the cap, membrane and diaphragm of the reservoir, if provided.
3. Fit the membrane and diaphragm and close the cap following the vehicle manufacturer’s instructions.
4. Thoroughly clean any brake fluid that has leaked out of the reservoir using a damp cloth.
5.Avoid direct contact with brake fluid as it can cause irritation to the skin and eyes. In the event of contact, clean thoroughly in accordance with the vehicle or brake fluid manufacturer’s instructions.
6. To achieve full braking efficiency, operate the brake lever/pedal to allow correct positioning of the pads. Repeat this operation until the lever/pedal stroke has stabilized at approximately 1/3 of the total stroke. When a constant force is applied, the lever/pedal stroke should not change even after a long period.
DANGER! If the pressure or pressure stability are not obtained, re-check the entire braking system. Under these conditions the brake cannot be used.
- Re-check the braking system for leaks.
- Re-check the brake fluid level in the reservoir and top up if necessary, following the vehicle manufacturer’s instructions. Use only new brake fluid of the grade specified for the particular vehicle type.
7. Perform braking tests at low speed.
Testing and bedding in
During initial use of the new pads, remember that braking performance is reduced and therefore it is necessary to:
- moderate your speed.
- avoid sudden braking.
- always observe all applicable traffic laws and regulations.
Road test the vehicle, taking care not to stab at the brakes or keep the pedal depressed for more than 3 seconds; make certain there is no noise or vibration from the brakes.
DANGER! Always follow the bedding-in instructions provided by the vehicle manufacturer. In the absence of instructions provided by the vehicle manufacturer, it is recommended to use the vehicle for of at least 100km/61miles applying the brakes gently and sparingly during that period, avoiding sudden braking for more than 3 seconds and without activating the vehicle’s Antilock Braking System. Carry out a functional test on a rolling road to ascertain that the system meets all legal requirements.
WARNING! If new brakes are not properly broken in, the braking system may not operate properly.
Maintenance
Brake pads are wearing parts and must therefore be checked at regular intervals.
If the thickness of friction material remaining on a pad is less than 2 mm or the wear indicator releases, replace all the pads on an axle.
If the thickness of friction material remaining on a pad is less than 2 mm or the wear indicator releases, replace all the pads on an axle.
Used brake pads must be disposed according to the legal requirement applicable under national and/or local regulations.
General and safety information
Please follow all instructions carefully.
If installed by a dealer, this document should be given to the vehicle owner. The vehicle owner should keep this document for the working life of the product. In the event of a change in the ownership of the vehicle into which the product has been installed, this document should be transferred to the new owner.
This BREMBO Product has been designed and manufactured to comply with all applicable safety standards. This Product is not intended to be used differently from the specific use for which it has been designed and manufactured. Use for any other purpose, or any modification to, or tampering with, the Product can affect the performance of the Product and may render the Product unsafe. Any modification, tampering or improper use of this Product will void the Limited Warranty, and may subject the individual so using the Product to liability for bodily injury or property damage to others.
DANGER! means procedures which, if not observed, have a high degree of probability that they will cause serious injury or even death.
WARNING! means procedures which, if not observed, could possibly cause injury.
CAUTION! means procedures which, if not observed, could result in damage to the vehicle.
General warnings and precautions
DANGER!
- Proper installation and use of this Product is essential for the safe operation of the vehicle on which it is installed. This Product is intended to be installed only by a skilled, qualified professional who has been trained and/or is experienced in the installation and use of this Product, who has knowledge and experience with vehicle repair and maintenance and is equipped with the appropriate tools of trade. As a general rule, closely follow the instructions contained in the original literature of the vehicle manufacturer. Do not use an impact screwdriver, observe torques, always replace self-locking screws/nuts/safety elements.
- Improper or incorrect installation, whether caused by a failure to faithfully and completely follow these Instructions or otherwise, will void the Limited Warranty and could subject the installer to liability in the event of personal injury or property damage. BREMBO shall not be liable for any damage or injury caused to or by any person operating a vehicle on which a replacement product has been improperly installed.
DANGER!
- The brake pads must be replaced for each caliper on the axle.
- Any used equipment being replaced by this Product should be properly discarded and must not be re-used or installed on any other vehicle. Property damage and serious personal injury, including death, could result.
- Ensure that the brake fluid level in the reservoir of the vehicle at all times is between the minimum and maximum levels indicated on the reservoir. An incorrect level of brake fluid can cause the brakes to malfunction and may result in personal injury, including death, and property damage. An incorrect level of brake fluid can also result in brake fluid leaks and reduce brake system efficiency.
- Always follow the brake-fluid manufacturer’s instructions regarding proper handling and use of brake fluid. Improper handling of brake fluid could result in serious injury or damage.
- Before commencing installation of this Product, ensure that this Product and any other parts and materials used are suitable for the make and model of the vehicle
- Always ensure the correct connection of any electrical contacts following installation. Before operating the vehicle, ensure that the vehicle’s brake warning lights come on when the brakes are used. If the vehicles’ brake lights do not come on, do not operate the vehicle
- Do not allow the friction material of the pads, discs, calipers or brake lines to come into contact with grease, oil or other mineral oil-based lubricants or degreasing products because this could affect proper functioning of the braking system and cause physical injury or property damage. Replace these parts in the event of contamination.
WARNING!
- In the course of installing this Product and installing or replacing related items such as brake fluid, brake pads, brake shoes, and the like, the installer may use or be exposed to fluids and other materials that may be deemed hazardous under applicable laws and regulations, or otherwise subject to laws and regulations regulating use and disposal. All such materials must be handled, recycled and/or disposed of in accordance with all applicable laws and regulations. The failure to do so could result in bodily injury, property damage, and civil or criminal penalties.
- Handle this Product with care during the installation process. Avoid sharply striking or any other rough handling of the Product along with its parts and its components, as damage to this Product may cause it to malfunction. Replace any damaged part or component.
- To avoid personal injury or damage to property while installing this Product:
- Always use a respirator or other suitable equipment to prevent the inhalation of dust raised during cleaning of the parts and components.
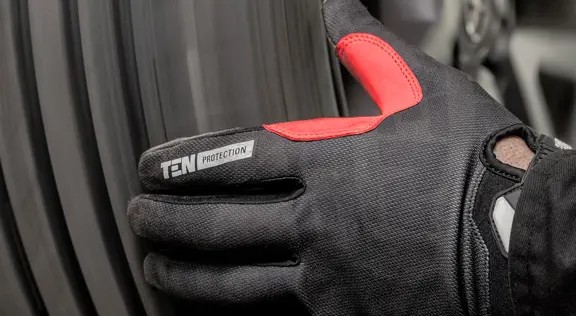
- Always wear gloves during disassembly and assembly of components with sharp edges.
- Do not allow skin surfaces to make direct contact between the pad and shoe linings since this could cause abrasions.
- Avoid direct contact with brake fluid as it can cause irritation to the skin and eyes. In the event of contact, clean thoroughly in accordance with the vehicle or brake fluid manufacturer’s instructions.
- Do not subject electrical components to electrostatic charges or impact which could damage plastic parts.
- Protect the disassembled electrical components from moisture and humidity.
- Dispose of replaced parts in accordance with applicable laws and regulations.
- These assembly instructions are a general guide that can vary from one braking system to another. Please also follow the instructions provided by the vehicle and/or caliper manufacturer.
- Should any damage or other defect be observed on any part of the brake system during the installation process, the affected component(s) must be replaced before the vehicle is put back into service.
- Before commencing work on the braking system, attach a warning notice to the handlebar/steering wheel that the vehicle is under repair, chock the wheels not being worked on, jack up the vehicle and ensure that the vehicle is in a stable position.
CAUTION!
- Do not use mechanical force during disassembly.
- The illustrations are provided only as a guide.
Disassembly warnings and instructions
CAUTION!
- Complete the installation on one side of the axle before beginning installation on the other side of the axle. These replacement and installation steps must be identical for both brakes on the same axle. Install one brake at a time. To check if the installation is correct, you can use the brake on the other side of the axle which you have not removed yet as a visual comparison for the correct positioning of the individual parts during reassembly.
- Never apply the brake pedal or parking brake when working on the brake system, as this may cause damage to the system.
- Note the position of all the components disassembled or partially disassembled to ensure correct refitting.
- Carefully clean all the components to be installed or reinstalled (new or previously disassembled) and the contact surfaces between the various components using suitable products (e.g. a damp cloth).
- Note the position of all the components disassembled or partially disassembled to ensure correct refitting.
WARNING!
- During all the operations described, the caliper liquid inlet hose must NOT be disconnected.
- The pads must always be replaced throughout the vehicle axle.
- Check brake caliper, all other moving parts and sliding/guide elements to ensure they are not worn out and are working properly.
- Check all steering and wheel suspension elements as well as wheel bearings for play and wear.
- Open the brake fluid reservoir cap, checking the fluid level. The retraction of the pistons described below causes an increase in the brake fluid level in the reservoir. Ensure that the fluid level is not such as to cause a leak which would damage the painted parts of the vehicle. Any accidental splashes or leaks of fluid should be promptly dabbed with paper and cleaned with water.
- Do not disassemble any type of accessory fixed to the piston.
DANGER!
- Hook the caliper to the vehicle chassis by mean of appropriate supports so as to prevent damage to the flexible hose.
- Avoid creating bends, kinks, stretching or other contortions of the brake fluid supply tube.
- Carefully clean all the components to be installed or reinstalled (new or previously disassembled) and the contact surfaces between the various components using suitable products (e.g. a damp cloth).
- Ensure that any components to be installed or reinstalled are in perfect condition; if damaged, replace them with new components.
Warranty limitations
This warranty covers all the conformity defects occurring within two years from delivery of the good. The consumer is required to report to the seller the conformity defect within two months from the date of discovery of the said defect, without prejudice to the fact that the limitations period for taking action aimed at seeking redress for the defect is twenty-six months from delivery of the good. In the event of a conformity defect, the user has the right to repair or replacement of the good, or to an appropriate price reduction or termination of the contract, as established by art. 130 of the Consumer Code, where applicable.This warranty constitutes the only warranty provided in relation to this product and replaces any other warranties, both verbal and written.
Is there anything else you want to ask?
Contact the Brembo technical support team. Our technicians will get back to you as soon as possible!