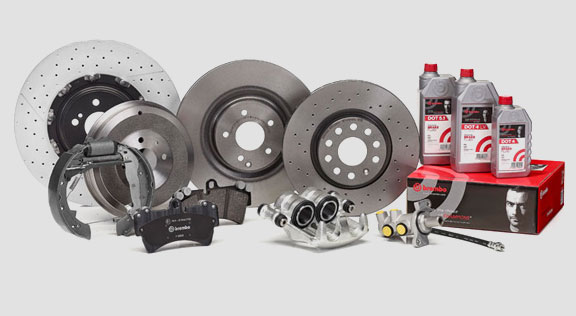
Instructions for replacing drum brakes on cars and light commercial vehicles
Please read and follow all instructions carefully. You’ll find the same instructions in the drum brake pack. Remember to keep them for the entire product life cycle. Hand them over to the new owner if you sell your vehicle.
These fitting instructions are a guideline for standard repair work and do not take into consideration any special features which might apply to the different brake systems. The special instructions issued by vehicle and brake system manufacturers must be followed in detail.
Before commencing replacement, ascertain that the spare parts used for replacement are suitable for the make and model of the vehicle.
Replacement procedure
The procedure described is for one wheel, and must be repeated on the other wheel of the axle.
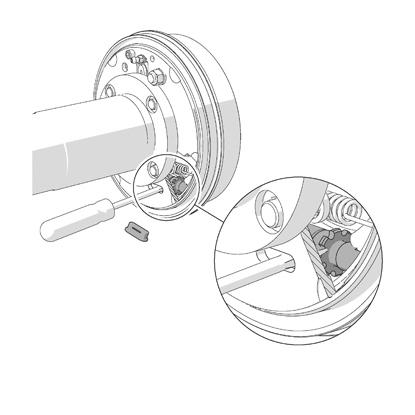
1. Remove the wheels.
2. The hand brake must be released completely.
3. Reset the automatic or manual adjustment of the brake blocks completely.
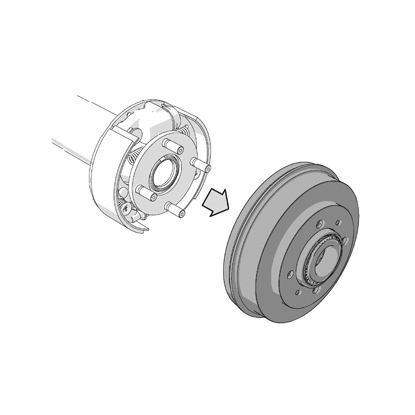
4. Disassemble the brake drum.
WARNING! Do not apply any force to avoid damaging the hubs and wheel bearings, sensors and toothed rings.
WARNING! Always use the special tools envisaged.
WARNING! Always use the special tools envisaged.

5. In the case of brake drums with wheel bearings and integrated toothed rings, disassemble these parts for subsequent re-use (only if undamaged and faultless).
Before proceeding with the other steps in the replacement procedure, we recommend you clean and check the Product for easier fitting.
Cleaning/checking/preliminary fitting
1. Clean the surface of the flange/centring shim in the wheel hub, which must be perfectly clean, rust-free, burr-free and smooth; polished flange surface (do not use angle grinders!).
2. In the case of brake drums with integrated wheel bearings, fit the new parts or undamaged and faultless disassembled parts according to the instructions; apply the specific lubricant recommended.
3. Fit new seal elements for the wheel bearings.
4. Where present, fit the toothed ring (new or undamaged and faultless).
DANGER! All the drum brake components, such as the wheel cylinders, brake blocks, springs, levers, stirrups, lips, etc. must be checked before being reused to ensure they are in perfect working order; otherwise replace them.
5. Unless otherwise specified, remove the rust-proof product on the new brake drum completely only in correspondence with the flange and working surface.
Check that the surface of the flange is clean, burr-free and undamaged.

Fitting procedure

1. If using new brake blocks, reset their adjustment completely.
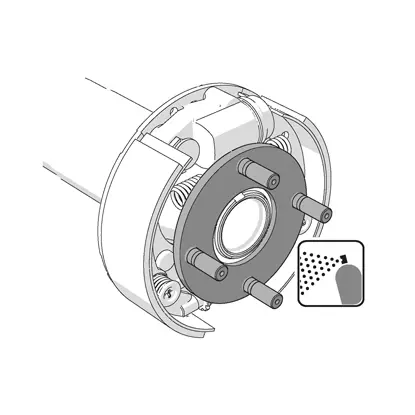
2. In the case of a separate wheel hub, apply a very thin film of rust-proof product (not paste) evenly onto the flange.
3. Centre the brake drum; depending on the type of fixed construction with the screw or with the safety device and/or with the wheel.
4. Tighten uniformly in a criss-cross pattern or (proceed clockwise) in two phases, using the recommended tightening torque.
5. In brake drums with integrated wheel hub, centre the brake drum, adjust/fix the wheel bearing as recommended, close with a new cap or an undamaged and faultless one.

6. Adjust the operating/hand brake block clearance as recommended.

7. Fit the wheels and tighten as set out in point 13.
8. If the hydraulic system was opened, fill/bleed the braking system with the recommended fluid.
Final check
CAUTION! Check that rubber parts are not damaged. Replace if necessary.
1. Operate the pedal to bring the shoes closer to the drum. Repeat this process until the pedal travel is as it should be.
2. Check the level of brake fluid in the reservoir, topping up if necessary.
3. Balance the wheel.
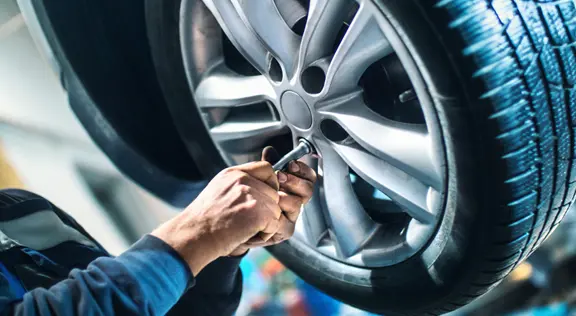
4. Refit the wheel and tighten the wheel nuts as indicated by the vehicle manufacturer or as in the Brembo catalogue.
Testing and running in
Road test the vehicle, taking care not to stab at the brakes or keep the pedal depressed for more than 3 seconds; make sure there is no noise or vibration from the brakes.
The user of the vehicle should run in the new discs and pads for at least 200 km, applying the brakes gently and sparingly, and without activating the ABS.
The user of the vehicle should run in the new discs and pads for at least 200 km, applying the brakes gently and sparingly, and without activating the ABS.
DANGER! If new brakes are not properly run in, the braking system could be prevented from operating efficiently.
General and safety information
This Brembo product has been designed to comply with all applicable safety standards. Products are not intended to be used differently from the specific use for which they have been designed and manufactured. Use for any other purpose, or any modification to or tampering with the Product can affect the performance of the Product and may render the Product unsafe.
Such modification or improper use will void the Limited Warranty, and may subject the individual so using the Product to liability for bodily injury or property damage to others.
In these instructions, the “DANGER!” warning means procedures which, if not observed, have a high degree of probability that they will cause serious injury or even death.
In these instructions, the “DANGER!” warning means procedures which, if not observed, have a high degree of probability that they will cause serious injury or even death.
“CAUTION” means procedures which, if not observed, could result in physical damage whereas “WARNING!” means procedures which, if not observed, could possibly cause damage to the vehicle.
DANGER!
Before commencing replacement, ascertain that the spare parts are suitable for the make and model of the vehicle. This Product is vital to the safe operation of the vehicle on which it is installed, and it is intended to be installed only by a skilled, qualified individual who has been trained and/or is experienced in the installation and use for which the Product is intended.
The installer must be equipped with the proper tools of his trade, and with the knowledge and experience to deal with vehicle repairs. Improper or incorrect installation, whether caused by a failure to follow these Instructions faithfully and completely or otherwise, will void the Limited Warranty and could subject the installer to liability in the event of personal injury or property damage.
Brembo shall not be liable for any damage or injury caused to or by any person operating a vehicle on which a replacement product has been improperly installed.
The used product replaced by this Product must not be installed on any other product. This could result in property damage and personal injury, including death.
Always check that the brake fluid level in the reservoir is between the minimum and maximum levels indicated on the reservoir. An incorrect level can cause brake fluid leaks or reduced braking system efficiency. Too much or too little brake fluid in the reservoir could cause the brakes not to perform properly resulting in personal injury, including death.
CAUTION!
Replaced parts must be disposed of in accordance with the law.
It is vital to avoid sharply striking and/or damaging the Product, its parts and its components, as this can impair their efficiency and may cause them to malfunction. If necessary, replace any damaged part or component. To avoid injury we recommend the following:
It is vital to avoid sharply striking and/or damaging the Product, its parts and its components, as this can impair their efficiency and may cause them to malfunction. If necessary, replace any damaged part or component. To avoid injury we recommend the following:
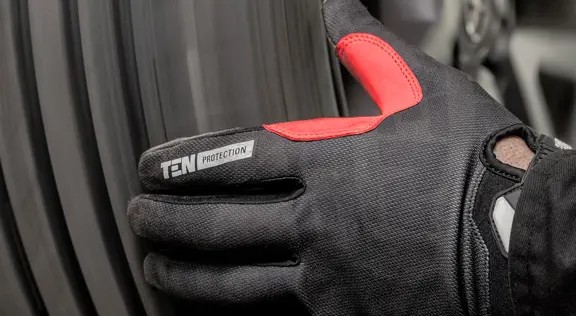
- Always wear gloves during disassembly and assembly of components with sharp edges.
- Do not allow skin surface to make direct contact with the friction material of pads and brake shoes since this could cause abrasions.
- Use suitable equipment to prevent the inhalation of dust raised during cleaning of the parts.
- Protect the disassembled electrical components from humidity.
- Avoid contact of grease and other lubricants with the braking surfaces of the disc and pad as this could affect the efficiency of the braking system and cause serious physical damage.
- Always replace both the brake drums on the axle, using the two drums provided. Every time the drums are changed you should also replace the shoes.
- Do not subject the electrical components to electrostatic charges or to impact which could damage the plastic parts.
- Ensure correct connection of any electrical contacts, checking that the warning lights come on. If they do not, non-operation of the warning lights can cause a reduction in efficiency of the braking system, or brake signalling failure.
Warranty limitations
This warranty covers all the conformity defects occurring within two years from delivery of the good. The consumer is required to report to the seller the conformity defect within two months from the date of discovery of the said defect, without prejudice to the fact that the limitations period for taking action aimed at seeking redress for the defect is twenty-six months from delivery of the good. In the event of a conformity defect, the user has the right to repair or replacement of the good, or to an appropriate price reduction or termination of the contract, as established by art. 130 of the Consumer Code, where applicable.This warranty constitutes the only warranty provided in relation to this product and replaces any other warranties, both verbal and written.
Is there anything else you want to ask?
Contact the Brembo technical support team. Our technicians will get back to you as soon as possible!
